
Oh My Posh is a powerful, customizable prompt theme engine for Windows PowerShell, helping you transform your terminal into a visually appealing and productive tool. This guide will walk you through the process of installing and configuring Oh My Posh on Windows.
Step 1: Install Oh My Posh
You can install Oh My Posh using one of two package managers: winget or scoop.
Using Winget
The winget package manager is installed by default on most Windows 10 and 11 machines. To install Oh My Posh using winget, run the following command in your terminal:
winget install JanDeDobbeleer.OhMyPosh -s winget
Using Scoop
If you prefer using Scoop, run:
scoop install main/oh-my-posh
Note: If you don’t have Scoop installed yet, check out our guide:
How to Install Scoop on Windows
Once the installation is complete, you’ll have Oh My Posh ready to be configured.
Step 2: Install a Nerd Font
Oh My Posh relies on special fonts called Nerd Fonts to render icons and symbols correctly. The easiest way to install the recommended font is:
oh-my-posh font install meslo
This command installs the Meslo Nerd Font, which is optimized for Oh My Posh.
Installing Custom Fonts
If you want to explore other fonts, use the following command:
oh-my-posh font install
This will present you with a list of available fonts to install. For a comprehensive catalog of Nerd Fonts, visit Nerd Fonts Official Site.
After installing a Nerd Font, make sure to set it as the default font in your terminal emulator.
Step 3: Configure Oh My Posh as Default in PowerShell
To make Oh My Posh your default prompt every time you open PowerShell, follow these steps:
Step 3.1: Create the PowerShell Configuration File
Run the following command to create a configuration file if it doesn’t already exist:
New-Item -Path $PROFILE -Type File -Force
This ensures that a $PROFILE file is created where PowerShell can store startup configurations.
Step 3.2: Open the Configuration File in Notepad
Edit the $PROFILE file using:
notepad $PROFILE
This will open a blank Notepad window.
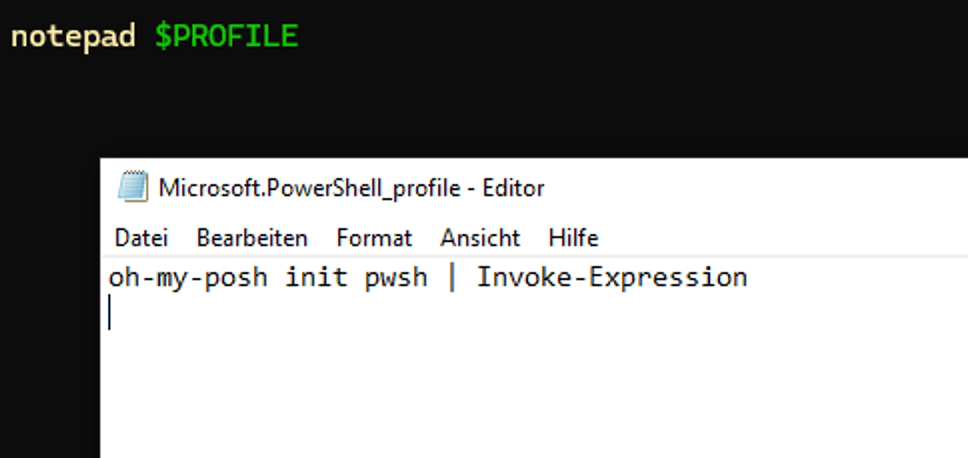
Step 3.3: Add Oh My Posh Initialization Code
Copy and paste the following line into Notepad:
oh-my-posh init pwsh | Invoke-Expression
Save the file and close Notepad.
Step 4: Add a Theme to Oh My Posh
Now that Oh My Posh is installed and configured, you can customize its appearance by adding a theme. Themes allow you to tailor the colors, icons, and structure of your terminal prompt.
For a detailed guide on how to add and customize themes in Oh My Posh, check out our tutorial:
How to Add a Theme to Oh My Posh
Step 5: Restart PowerShell
Close your terminal and reopen it. You should now see a beautifully themed terminal powered by Oh My Posh
With this setup, you now have a stylish, functional terminal to boost your productivity and showcase your personality. Have fun customizing Oh My Posh to suit your preferences!