
Winfetch is a lightweight system information tool designed for Windows users. It provides visually appealing output with detailed system data, offering a sleek alternative to the traditional command-line interface.
If you’re familiar with Neofetch, a popular system information tool for Linux, you’ll find Winfetch to be a comparable solution tailored for Windows.
In this guide, we’ll cover two quick and hassle-free methods to install Winfetch using Winget and Scoop. Both package managers simplify software installation on Windows, ensuring minimal effort.
Prerequisites
- A Windows 10 or later operating system.
- Winget or Scoop installed on your system.
- Basic familiarity with PowerShell or Command Prompt.
Installing Winfetch Using Winget
Step 1: Open PowerShell or Command Prompt
To begin, open PowerShell or Command Prompt. You can do this by searching for it in the Start menu or pressing Windows + R, typing cmd or powershell, and hitting Enter.
Step 2: Install Winfetch
Run the following command to install Winfetch using Winget:
winget install winfetch
Step 3: Verify Installation
After the installation is complete, run the following command to verify that Winfetch is installed correctly:
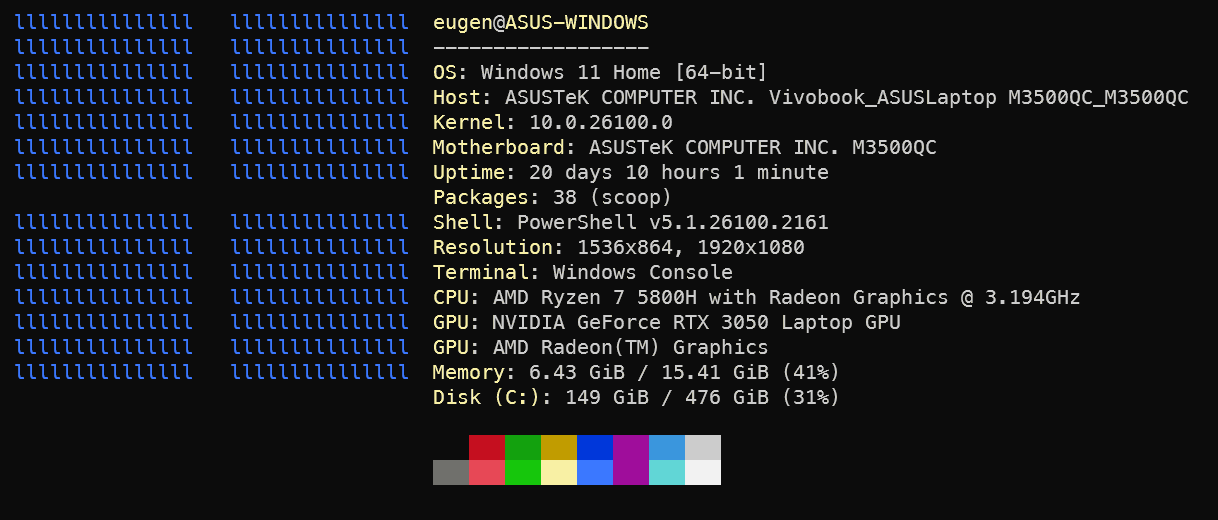
winfetch
Installing Winfetch Using Scoop
Step 1: Install Winfetch with Scoop
Run the following command in PowerShell to install Winfetch:
scoop install winfetch
Step 2: Verify Installation
After installation, run the following command to ensure Winfetch works as expected:
winfetch

Learn More: You do not have scoop installed? Here is a complete guide on setting up Scoop, check out our tutorial:
Scoop Tutorial
Conclusion
With Winfetch installed using either Winget or Scoop, you now have a powerful yet stylish tool to display detailed system information. Whether you prefer a modern package manager or the simplicity of direct commands, Winfetch makes your Windows experience more informative and visually appealing. Give it a try today!